
With Hubbub Pro 2.31.0, you can create as many Save This forms as you’d like. Each form has its own design, its own placement rules, and (optionally) its own email. For example, you could show one form on your dessert recipes, a different form on your travel posts, and a third form only on pages.
Where to find your forms #
In your WordPress Admin, go to Hubbub > Save This. The settings page now has two tabs:
- Forms – Create, edit, and place your Save This forms.
- Form Defaults & Email – The default text, colors, and email settings every form starts with, plus your mailing list connection and automation settings.
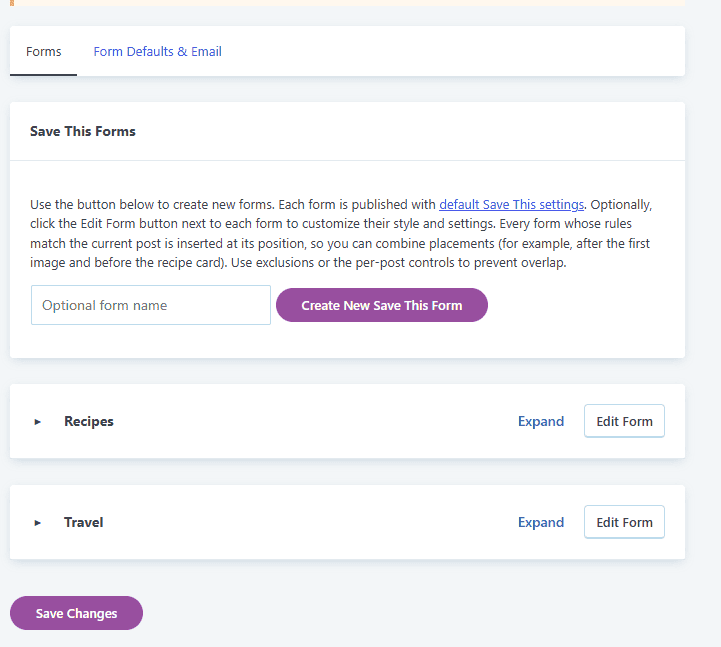
Already using Save This? Your existing form has been moved to the Forms tab for you, with the same position and post types it had before. Nothing on your site changes until you edit it or add more forms.
Create a new form #
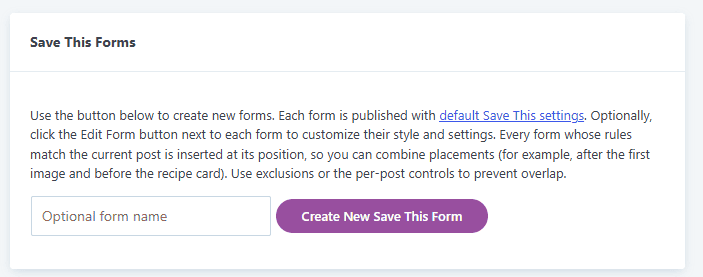
- Go to Hubbub > Save This > Forms.
- Optionally, type a name for the form (such as “Dessert Recipes”). This name is shown to you in the admin, and is sent to your mailing list and Zapier (see “Segmenting subscribers by form” below).
- Click Create New Save This Form.
The new form is published using your default Save This settings, so it’s ready to use right away.
Customize the form’s design #
Click Edit Form on the form’s card. This opens the form in the block editor, where you can change its heading, message, button text, colors, consent checkbox, success message, and more using the Save This block settings in the sidebar.
Any setting you leave blank uses your Form Defaults. For a full list of block settings, see How to Use the Save This Block.
Click Save when you’re done.
Choose where the form appears #
Back on the Forms tab, each form’s card has its placement settings.
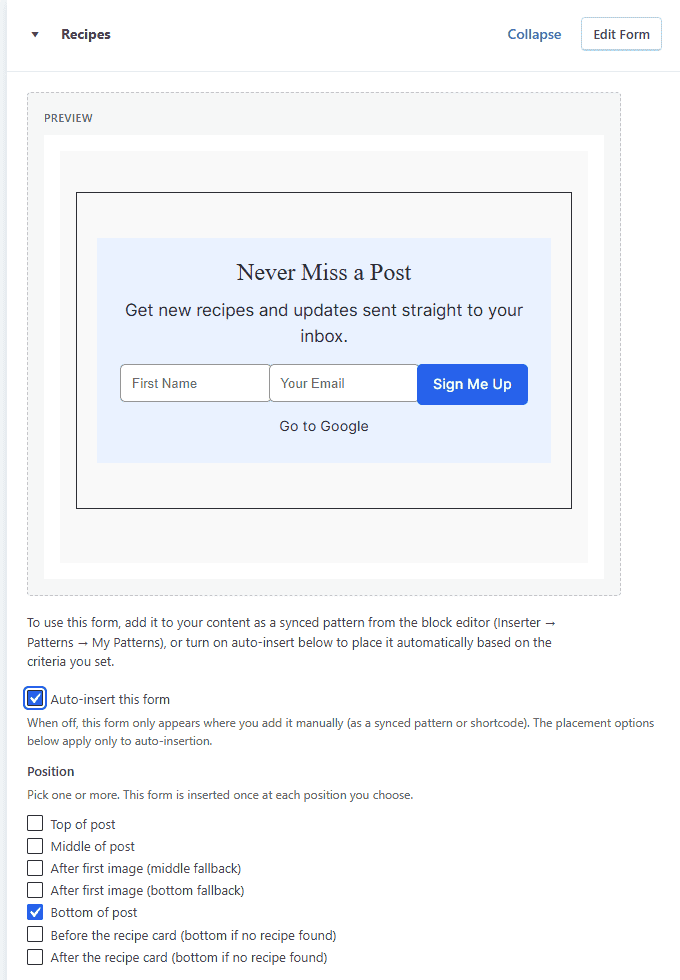
Auto-insert this form #
Turn this on to have Hubbub place the form in your posts automatically. When it’s off, the form only appears where you add it yourself (as a synced pattern in the block editor, or with its shortcode).
Position #
Pick one or more positions. The form is inserted once at each position you choose.
- Top of post
- Middle of post
- After first image (middle fallback) – If the post has no image, the form goes in the middle.
- After first image (bottom fallback) – If the post has no image, the form goes at the bottom.
- Bottom of post
- Before the recipe card – Bottom of the post if no recipe card is found.
- After the recipe card – Bottom of the post if no recipe card is found.
The recipe card positions support WP Recipe Maker, MV Create, and Tasty Recipes. See How to Insert Save This Before or After Your Recipe Card.
Which posts the form appears on #
- Show on these post types – Leave all unchecked to show the form on every public post type.
- Only on these categories – Leave empty to ignore categories.
- Only on these tags – Leave empty to ignore tags.
Exclusions #
- Never on these post types
- Never on these categories
- Never on these tags
Exclusions always win. For example, a form set to show on all Posts but Never on the “Sponsored” category won’t appear on any sponsored post.
Click Save Changes when you’re done.
When more than one form matches a post #
Every form whose rules match the post is inserted at its own position. This lets you combine placements on purpose — for example, one form “After first image” and another “Before the recipe card.”
If you want only one form per post, use the category, tag, and exclusion settings so your forms don’t overlap. For example:
- Form A: Only on the “Desserts” category, Before the recipe card
- Form B: Posts, Never on the “Desserts” category, Before the recipe card
Hiding or showing Save This on a single post #
In the post editor, the Hubbub panel’s Display Options lets you override your rules for that post:
- Hide checked tools – Check Save This to keep all auto-inserted Save This forms off this post.
- Show checked tools – Check Save This to let forms appear on this post even if its post type isn’t in a form’s “Show on these post types” list. (A form’s “Never on” exclusions still apply.)
Adding a form by hand #
In the block editor (recommended) #
Each form is saved as a synced pattern. In the block editor, open the Inserter, go to Patterns > My Patterns, and choose your form.
With a shortcode #
For the Classic Editor, widgets, or recipe card templates, copy the shortcode shown on the form’s card. It looks like this:
[hubbub_save_this id="1234"]
When you place a form by hand in a post, that form won’t also be auto-inserted into the same post. Other forms whose rules match the post still auto-insert. See Save This Shortcode for all options.
Customize the email each form sends #
Each form card has an Email customization (this form) section. Use it to give a form its own email, so different forms can speak to different audiences.
- Email subject – Default:
You Saved This: {post_title} - Email message – Shown directly above the link to your post.
- Email bottom content – Shown at the bottom of the email.
- Featured image in email – Use global setting, Show featured image, or Hide featured image.
Leave any field blank to use the email settings on the Form Defaults & Email tab.
Merge fields #
You can personalize the subject, message, and bottom content with these merge fields:
| Merge field | Replaced with |
|---|---|
{name} | The visitor’s name (if your form shows the name field) |
{post_title} | The title of the saved post |
{email_address} | The visitor’s email address |
{saved_url} | The link to the saved post |
{site_name} | Your site’s title |
{site_url} | Your site’s URL |
{site_domain} | Your site’s domain, such as example.com |
Example subject: Your {post_title} recipe from {site_name}
Segmenting subscribers by form #
Save This records which form a subscriber used, so you can segment and automate by form:
- Zapier (and any webhook): Each submission includes
form_idandform_name. See Automations – Triggering Zaps. - Kit: With Include extra data? turned on in your Kit connection settings, subscribers get
hubbub_form_idandhubbub_form_namecustom fields, along with the post title, ID, and URL. - Drip: Subscribers get the same
hubbub_form_idandhubbub_form_namecustom fields.
Want each form to add subscribers to a different list, form, tag, or group? Use the Mailing list destination setting in the Save This block. See How to Use the Save This Block.
Moving a form to the Trash #
Click Move to Trash on a form’s card to stop using it. Trashed forms are listed at the bottom of the Forms tab.
Click Restore to bring a form back exactly as it was — published, with its placement rules and email settings intact. WordPress empties the Trash on its own schedule, so restore anything you want to keep.
Troubleshooting #
My form isn’t appearing.
- Make sure Auto-insert this form is on.
- Check the form’s post types, categories, tags, and exclusions.
- Check the post’s Hubbub Display Options in the editor.
- If the form card says “This form is not published,” click Edit Form and publish it.
- Clear all caching on your site.
Two forms are showing on the same post.
More than one form’s rules match that post. Use categories, tags, or exclusions so they don’t overlap, or remove a manually-placed form from the post.
The form appears at the bottom instead of the position I chose.
- For recipe card positions, Hubbub didn’t find a supported recipe card on the post.
- If you’ve added classes or IDs under Exclude from blocks on the Form Defaults & Email tab, and the post contains one of them, the form is placed at the bottom of the post instead.
If you’re still stuck, email support@morehubbub.com and we’ll be happy to help!